Required Parts
The necessary hardware and materials to construct the Brainiac.
Building a robot isn't a cake recipe. There some parts that have different brands, housing, or specification but should work without any additional adjustment. Also, other changes might require new mathematical modeling, so beware when changing it. Thus, bellow we have 2 lists, one for the necessary components and the other with desirable ones that would not affect robot performance changing them.
The necessary components:
- Chassis kit
- 2 motors with encoders
- 2 wheels
- 3S LiPo Battery
- H bridge driver
- 2 infrared sensors
- Inertial Measurement Unit
- BeagleBone Black Wireless
The desirable components:
Chassis kit
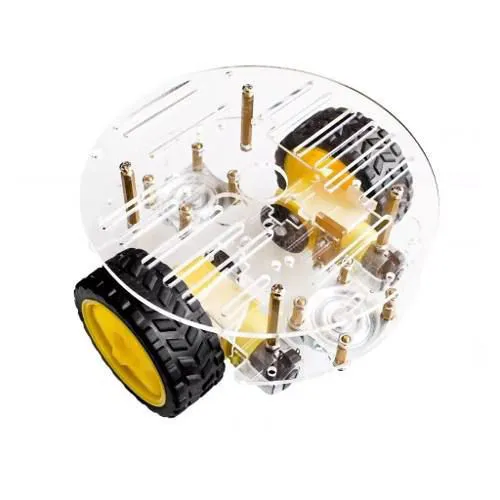
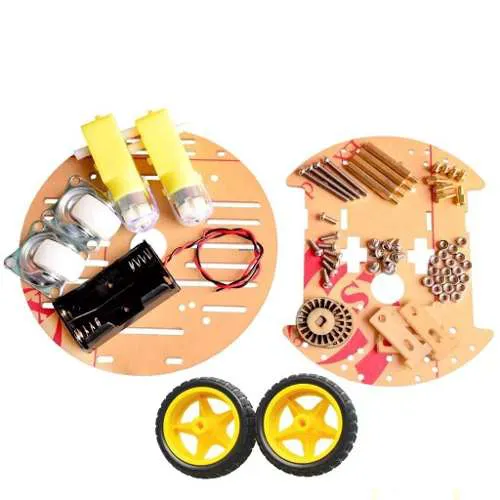
The chassis is necessary to hold all the hardware providing a solid structure to the robot. The chassis used by the Brainiac is at the image below:
 |
 |
|---|---|
Note that the motors and its wheels showed at the image will not be used. From this chassis kit, the Brainiac uses the acrylic chassis itself with its screws and the universal wheel.
The chassis kit dimensions:
- Circle base: 140 x 3mm
- Rectangular base: 140 x 110 x 3mm
The universal wheel dimensions:
- Wheel diameter: 25.5mm
- Total height: 34mm
- Weight: 33g
You can by this chassi kit at Casa da Robotica.
Motor with encoder
The pair of motors gives the robot the necessary effort to move forward and also turn. To perform a closed-loop control and estimate the traveled distance the encoder is necessary. The image below shows the Brainiac motor:
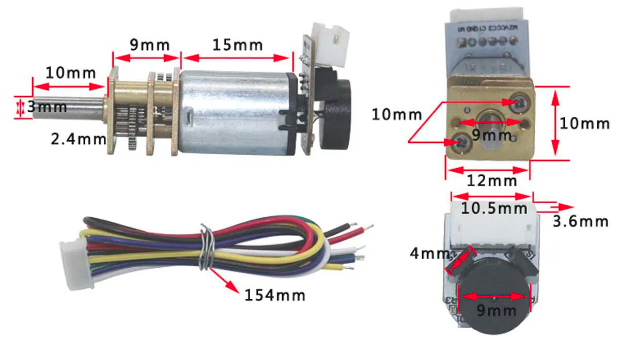
The motor supply limit is 12V. Some motor specification:
- Weight: 14.5g
- Reduction Ratio: 1:100
- No-load current: 60mA (verified)
- No-load speed: 220rpm (verified)
- Nominal speed: 130rpm
- Nominal current: less than 110mA
- Nominal torque: 1.0kg*cm
- Stall current: 450mA
- Stall torque: 1.5kg*cm
You can buy this motor with the encoder at Casa da Robotica. More information about this motor can be found at Chihai motor.
Wheels
The wheels are necessary to make the robot move smoothly. To have a good interface with the floor, a rubberized wheel was chosen as the image below:
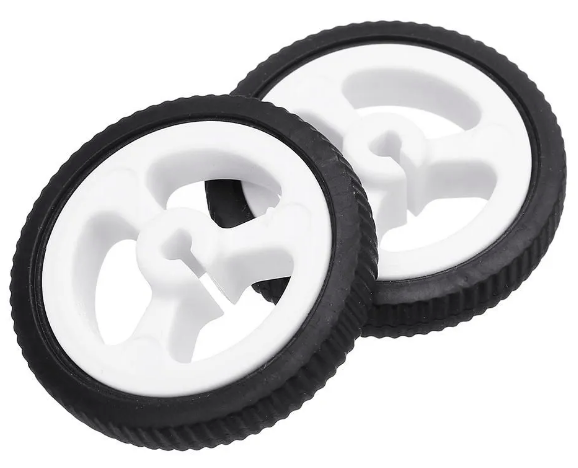
The wheels specification:
- Diameter: 34mm
- Tire width: 6.5mm
- Weight: +-5g per wheel
You can buy these wheels at Casa da Robótica.
3S LiPo Battery
The battery makes all system alive and running. But a good battery is essential to have our system working as expected without bad surprises. In fact, we tried to use common 9V batteries to supply the motors but was not enough.
The battery being used now is a 3S LiPo battery with 500mAh capacity. The capacity can be slower but then the robot lifetime will be slower, also, the voltage will vary faster. Thus 500mAh is a good number to keep the motors running an hour without having much voltage variation.
The image bellow shows the battery:
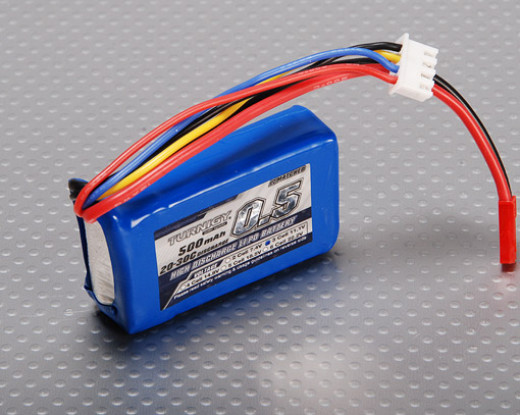
The battery specification:
- Capacity: 500mAh
- Nominal voltage: 11.1V
- Weight: 49g
- Size: 56 x 30 x 19mm
You can buy this battery at HobbyKing.
H bridge driver
The H bridge driver is necessary to control motors velocities. A popular H bridge driver used with Arduino is the L298N module. You may use others. The image bellow shows the L298N H bridge module:

Some specification:
- Input voltage: 4~35V
- Max current: 2A per channel
- Logical voltage: 5V
- Max power: 25W
- Dimensions: 43 x 43 x 27mm
- Weight: 30g
You can buy this driver at Casa da Robótica.
2 infrared sensors
The infrared sensor provides our robot with the capability of seeing if the ground is black or white. Thus, this is essential to run Monte Carlo Localization on our robot. There are 2 of them because originally we would use the digital pin informing black or white. In this way, we would adjust their threshold to have one to see black and others to see white, creating a dead zone. But since we can read it directly from analog input no need for that. The image below shows it.
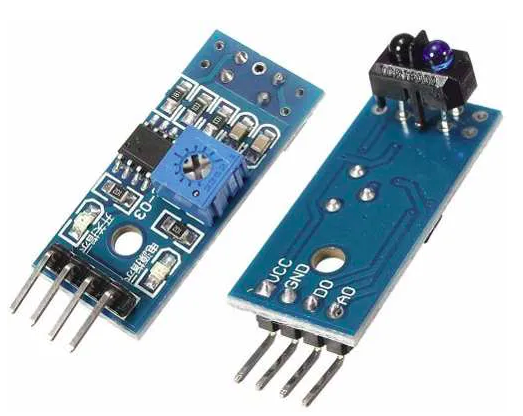
Some specifications: - Size: 14mm x 32mm.
You can buy these sensors at Casa da Robótica.
Inertial Measurement Unit
The Inertial Measurement Unit (IMU) provides acceleration readings in the 6-DOF and also has a magnetometer to provide the absolute orientation. The IMU will be used in different ways, to get an orientation measurement and use the accelerations readings to better estimate the robot velocities and then position. The IMU used in this project is the cheap and tiny HW-290 module. The image below shows it.
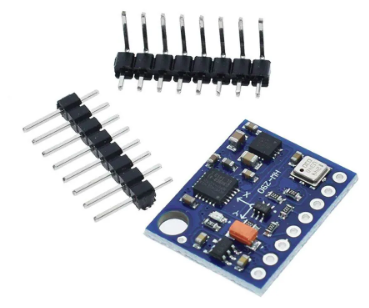
You can buy this imu at Casa da Robótica.
BeagleBone Black Wireless
The BeagleBone Black is the robot brain. Is a tiny computer running a Linux system with the ROS on it. Our BeagleBone Black used in this project is wired, thus we have a USB wi-fi adapter to make our robot wireless. The other instructions will be set as using the wired, but we will advise where the steps would change between those boards. The BeagleBone Black image:

Some specifications: - 512MB DDR3 RAM. - 4GB 8-bit eMMC onboard flash storage. - 3D graphics accelerator. - NEON floating-point accelerator. - 2x PRU 32-bit microcontrollers. - Size: 86.40mm × 53.3mm. - Weight: 40g
More information at BeagleBone site.